 how-to
How to Stop Makeup Brushes Shedding: A Pro Guide
Table of Contents
- Why Makeup Brushes Shed and What You Can Do About It
- How to Clean Professional Makeup Brushes to Prevent Shedding
- The Best Way to Dry Makeup Brushes Properly
- Daily Maintenance Habits That Reduce Shedding
- Signs It Is Time to Replace Makeup Brushes
- Common Mistakes That Make Shedding Worse
- Conclusion
Why Makeup Brushes Shed and What You Can Do About It
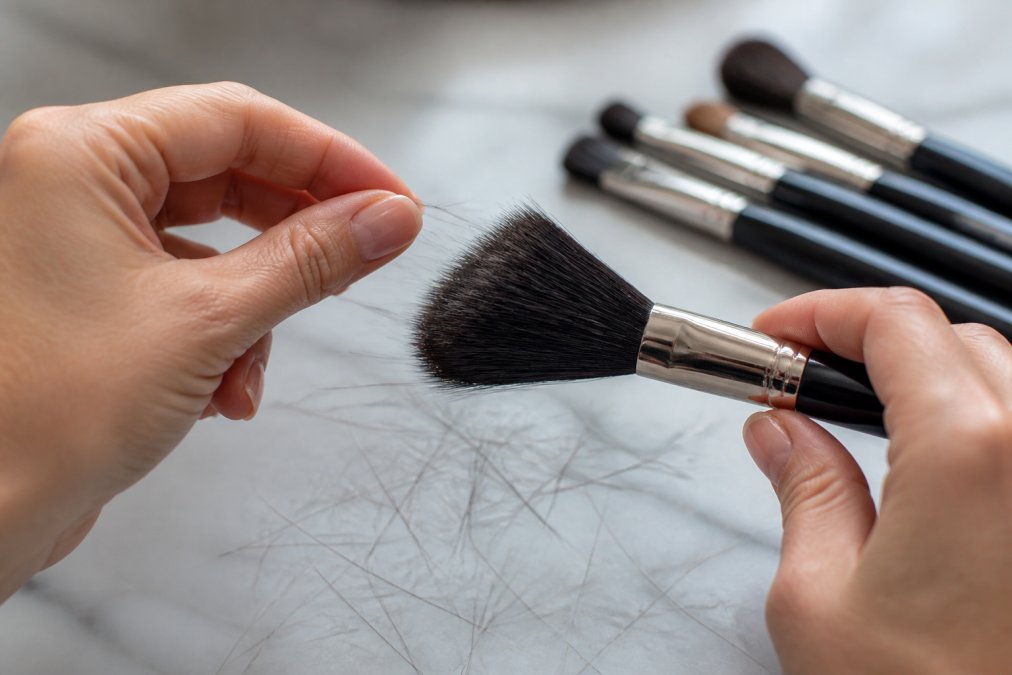
Makeup brushes shedding is one of those frustrating problems that catches most people off guard. You're applying foundation, and suddenly there's a stray bristle on your face. Or worse, you're halfway through a client's makeup at a wedding, and your brush starts leaving hairs everywhere.
The truth is, shedding happens for a reason, and it's usually preventable.
At Girl Meets Brush, we've worked with professional makeup artists and beauty enthusiasts for years, and we've learned that most shedding comes down to three main culprits: poor cleaning habits, incorrect drying techniques, and using the wrong products on your brushes. The good news? Once you understand what causes the problem, you can stop it before it starts.
This guide walks you through exactly how to prevent makeup brush shedding, from the cleaning process to daily maintenance habits that keep your brushes in professional condition. Whether you're a makeup artist working with clients or someone who takes their personal makeup application seriously, these techniques will extend the life of your brushes and keep them performing like new.
How to Clean Professional Makeup Brushes to Prevent Shedding
Regular cleaning is the foundation of preventing makeup brush shedding. When product, oil, and bacteria build up in the bristles, they weaken the bonds that hold hairs together (peer-reviewed research). That's when shedding starts.
The key is consistency. Cleaning your brushes properly, and doing it regularly, stops shedding before it becomes a problem.
Choosing the Right Cleanser
Not all cleansers are created equal when it comes to makeup brush care. You need something that removes product buildup without stripping the bristles or damaging the glue that holds them together.
Many professional makeup artists use gentle, pH-balanced cleansers specifically designed for brushes. These tend to work better than harsh soaps or shampoos, which can dry out bristles and weaken the adhesive at the ferrule (the metal part that holds the bristles in place).
A common mistake is using regular hand soap or washing-up liquid. These are often too alkaline and can cause bristles to become brittle. If you're starting out and don't have a dedicated brush cleanser, a gentle baby shampoo works reasonably well as a temporary solution, but investing in a proper brush cleanser is worth it for serious use.
The cleanser you choose should lather easily and rinse clean without leaving residue. You want something that dissolves makeup without requiring aggressive scrubbing, which can pull bristles loose.
The Step-by-Step Cleaning Process
Here's the process that prevents makeup brush shedding most effectively:
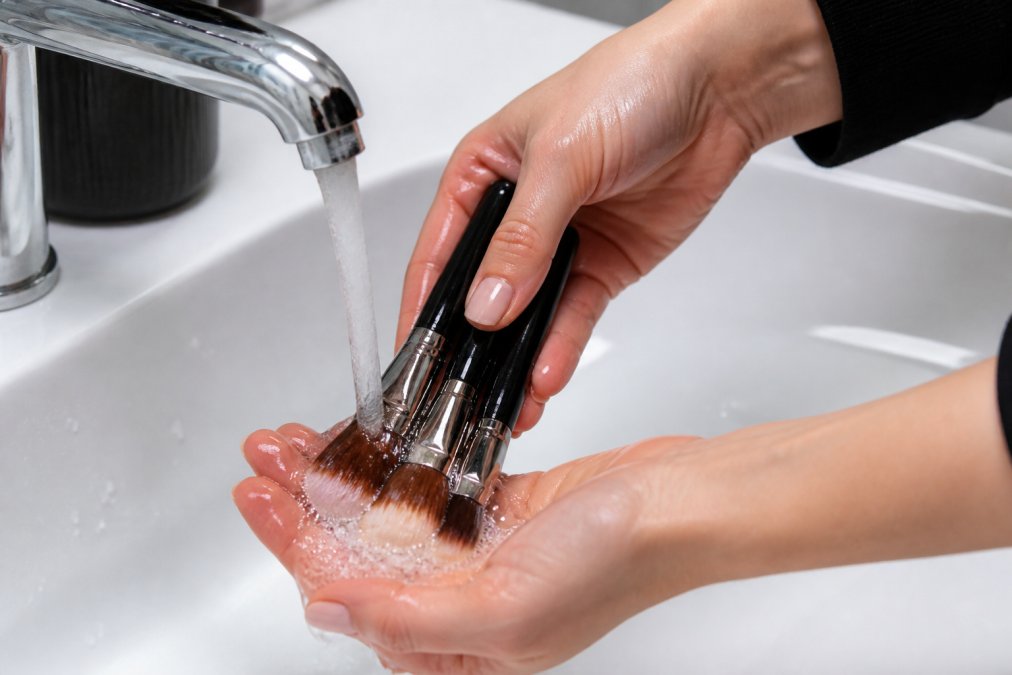
Step 1: Rinse under lukewarm water Hold your brush under running water with bristles pointing downward. Let water flow through the bristles for a few seconds to loosen surface product. Never point bristles upward, water running toward the ferrule can seep into the glue and weaken the bond.
Step 2: Apply cleanser Wet your palm or a brush cleaning mat with a small amount of cleanser. Gently swirl the brush bristles into the cleanser, working it through in circular motions. Don't scrub hard, gentle, deliberate movements are more effective and kinder to the bristles.
Step 3: Rinse thoroughly Rinse under running water again, bristles pointing down. Keep rinsing until the water runs completely clear. Product residue left in the bristles will continue to break them down over time.
Step 4: Repeat if necessary For brushes with heavy product buildup, repeat steps 2 and 3. Two or three cycles usually clears everything without over-working the bristles.
Step 5: Squeeze gently Using a clean towel, gently squeeze the bristles from ferrule to tip. This removes excess water without pulling bristles out. Never wring or twist your brushes, this is a common mistake that causes immediate shedding.
Step 6: Shape and set aside While the bristles are still damp, gently reshape them with your fingers to their original form. This helps them dry evenly and maintain their proper shape.
The entire process should take about two minutes per brush. If you're cleaning multiple brushes, batch the process, clean several at once, then move to the drying stage.
The Best Way to Dry Makeup Brushes Properly
How you dry your brushes matters as much as how you clean them. Incorrect drying is responsible for a huge amount of preventable shedding.
The best way to dry makeup brushes is flat on a clean towel with bristles pointing downward or slightly angled. This simple position prevents water from seeping into the ferrule, which weakens the glue holding bristles in place.
Never stand brushes upright in a cup or holder while they're wet. Water pools at the base of the bristles and eventually reaches the adhesive inside the ferrule. Once that glue weakens, bristles start coming loose within days.
Temperature matters too. Dry your brushes at room temperature, away from direct heat sources like radiators, hairdryers, or sunlight. Heat can cause the adhesive to break down and bristles to become brittle (peer-reviewed research). The drying process takes longer at room temperature, usually 4 to 8 hours depending on brush size and humidity, but it's worth the wait.
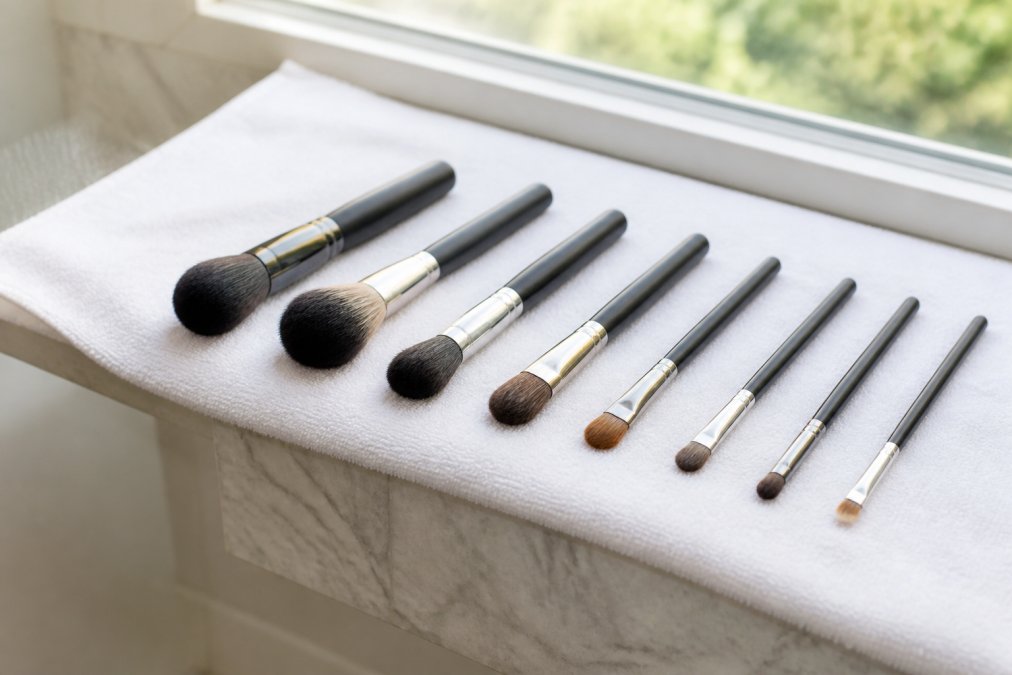
Air circulation helps too. If you're drying multiple brushes, space them out on the towel so air can reach all sides. Don't stack them or crowd them together. A well-ventilated room speeds drying without requiring heat.
One insider tip: place a clean, dry towel underneath your drying brushes as well. This keeps moisture from pooling underneath and helps them dry more evenly. Change the towel if it becomes damp.
Daily Maintenance Habits That Reduce Shedding
Preventing shedding isn't just about weekly deep cleaning. What you do between washes matters enormously.
Spot-clean between uses. Keep a brush cleansing spray or gentle cleanser at your makeup station. A quick spray and wipe on a clean tissue between applications removes excess product and prevents buildup. This cuts down on how much heavy cleaning you need to do and reduces the stress on bristles from frequent washing.
Store brushes properly. Keep your brushes in a clean, dry place away from humidity. A brush roll, cup, or case works fine, just make sure bristles point upward or are laid flat, never bent or compressed. Storing brushes with bristles bent against a surface causes permanent damage and accelerates shedding.
Handle brushes gently. This sounds obvious, but rough handling is a common cause of shedding. Don't drop brushes, don't apply excessive pressure when applying makeup, and don't pull on bristles. Treat them like the precision tools they are.
Replace your brush cleansing water regularly. If you're using a brush cleaning mat or bowl of water, change the water frequently. Dirty water doesn't clean effectively and can introduce bacteria that weakens bristles.
Avoid extreme temperature changes. Don't wash brushes in very hot water and then dry them in a cold room, or vice versa. Rapid temperature changes can cause bristles to expand and contract, which stresses the adhesive and causes shedding.
Condition bristles occasionally. Once a month, after cleaning, you can apply a tiny amount of lightweight conditioner to damp bristles (something like argan oil or a dedicated brush conditioning product). Work it through gently, then rinse and dry normally. This keeps bristles supple and reduces brittleness.
These habits take minimal time but make a dramatic difference in how long your brushes last.
Signs It Is Time to Replace Makeup Brushes
Even with perfect care, brushes eventually reach the end of their useful life. Knowing when to replace them prevents frustration and keeps your makeup application sharp.
Excessive shedding is the most obvious sign. If you're losing more than a few bristles per use, even after implementing all the prevention techniques above, the brush is nearing retirement. A little shedding is normal, a lot isn't.
Bristles becoming sparse or uneven. If you notice bald patches in your brush or the bristles are noticeably thinner than they used to be, the brush has lost its structural integrity. This affects how it applies makeup and usually means replacement is near.
Bristles that feel rough or wiry. Healthy brush bristles feel soft and smooth. If they've become coarse, scratchy, or uncomfortable on skin, the synthetic or natural hair has degraded. This often happens when brushes haven't been cared for properly, but it can also just be age.
Loss of shape. If a brush no longer holds its intended shape, if a fluffy powder brush has gone flat, or a precision brush has splayed out, it's time to replace it. Shape is essential for proper application.
Bristles that don't respond to cleaning. Sometimes product gets so embedded in bristles that even thorough cleaning won't remove it. If a brush looks discoloured or feels stiff after washing, it's probably past its prime.
Professional makeup artists typically replace their most-used brushes every 6 to 12 months, depending on how frequently they use them and how well they maintain them (the American Academy of Dermatology). Brushes used occasionally for personal makeup can last much longer, sometimes several years with proper care.
Common Mistakes That Make Shedding Worse
Understanding what NOT to do is just as important as knowing what to do.
Using the wrong water temperature. Very hot water can damage bristles and weaken adhesive. Very cold water doesn't clean effectively. Lukewarm is the sweet spot.
Scrubbing aggressively. People often think harder scrubbing means better cleaning. The opposite is true. Gentle, deliberate movements clean just as well and are much kinder to bristles. Aggressive scrubbing pulls bristles loose and damages them.
Leaving brushes wet for extended periods. If you clean brushes and then don't dry them properly, moisture sitting in the ferrule will eventually break down the adhesive. Always dry brushes promptly and completely.
Using products not designed for brushes. Makeup removers, facial cleansers, and other products might seem like they'd work, but they're often too harsh or leave residue that damages bristles over time. Stick to products formulated specifically for brush care.
Storing brushes bristles-down. This forces all the weight of the bristles downward and can cause permanent bending or splaying. Bristles-up or flat is always better.
Ignoring early signs of shedding. The moment you notice a few extra bristles coming loose, adjust your cleaning or drying routine. Early intervention prevents the problem from getting worse.
Using brushes on wet or damp skin. Applying makeup to skin that's still wet from cleansing or toning can cause bristles to absorb excess moisture, which weakens them. Always let skin dry completely before applying makeup.
Makeup brush shedding is frustrating, but it's almost always preventable. The techniques in this guide work because they address the root causes, moisture damage, product buildup, and harsh handling, rather than treating shedding as an inevitable problem.
Girl Meets Brush brushes are engineered with precision bristle construction and high-quality adhesive specifically designed to withstand professional use. When you pair that quality with proper cleaning, correct drying, and thoughtful daily maintenance, you get brushes that perform beautifully for years. Visit our shop to explore our range of professional-grade brushes crafted for precision application and lasting durability.
Frequently Asked Questions
Q: Is it normal for new makeup brushes to shed?
A: Yes, some shedding is normal when you first use new brushes, especially if they're natural hair. Manufacturers often leave loose fibres in the bristles during production. A gentle wash before first use removes most of these. However, excessive shedding, where bristles come out during application, signals poor quality or improper care. Quality brushes shed minimally after the initial wash and proper maintenance.
Q: Does washing makeup brushes cause them to shed?
A: Washing shouldn't cause shedding if done correctly. Harsh scrubbing, very hot water, or vigorous wringing can damage bristles and cause hair loss. Instead, use lukewarm water, gentle cleansers, and soft circular motions. Pat rather than squeeze, and always rinse with the bristles pointing downward. Proper cleaning technique actually prevents shedding by removing product buildup that weakens bristles over time.
Q: What's the best way to dry makeup brushes to prevent damage?
A: Lay brushes flat on a clean towel with bristles pointing slightly downward, never store them upright while wet. This prevents water from pooling at the base where the bristles are glued, which can weaken the bond and cause shedding. Allow 24 hours for complete drying in a well-ventilated space. Avoid direct heat sources like radiators or hairdryers, as extreme heat damages both natural and synthetic bristles.
Q: How can you tell if a makeup brush is poor quality?
A: Poor-quality brushes often shed excessively during application, feel scratchy on skin, or lose their shape after a few uses. Bristles may feel stiff or uneven, and the ferrule (metal part) might rust or loosen easily. Quality brushes maintain their shape, feel soft and densely packed, and shed only minimally after proper care. Professional-grade brushes are engineered with better materials and construction to withstand regular use without deteriorating.
This article was written using GrandRanker